So much easier than I anticipated. And the results are better too. I grew up not being able to see through the plastic but this stuff is like looking through glass.
I did find it to have a static cling so be careful where you are laying it out when making your cuts.
I found it helpful to attach the top, bottom, and then sides. In that order, while tugging at the edges, I got a much less wrinkled finish.
The kit cost $11. I hope I get that much savings in heat.
I have yet to do my living room window because I need a piece of trim at the bottom of the window. Not only will this give me a place to adhere the plastic, but I will also cut out the draft that comes from the gap in the plaster and the frame of the window. I think this window will make the most significant difference in the efficiency of heating our home.
Showing posts with label DIY. Show all posts
Showing posts with label DIY. Show all posts
Monday, January 2, 2017

Monday, December 12, 2016
Are you ready for home-ownership?
Our house has been the source of frustration and depression over the last two years. It has also been a great source of creativity and reward.
To be honest, I can't say if we were ready for home ownership. I thought we were. But there have been many challenges that I don't think we were ready for emotionally. I am very thankful that Tom has the knowledge and skills for renovation. And I am glad I have many sources of inspiration. Together, I wish there was a better way to share these skills with each other. Tom has been overwhelmed, we have been restricted financially, and I have been incredibly impatient at times.
Don't feel compelled to make the decision of home ownership without considering what may be motivating you to do so. Our motivations for owning a home were different from one another. Therefore, our expectations were different. All without realizing it because we both agreed it was what we wanted and didn't discuss it beyond that. (Terrible pattern that is present in many aspects of our relationship I might add.)
I am not sure what I might suggest to remediate these troubles. But I'm sure there are great sources for that.
It has been a lesson in patience for sure. Our gains have been small at times, but it has been an awesome feeling that slowly, bit by bit, project by project, there is less to "get done" and more to enjoy about our home.
It's a wonderful feeling, a great sense of accomplishment, to say, "I did that." I am sure there are other ways to embrace this feeling, but as we contemplated purchasing a home, there was no "better" way to share that together. Our society's culture dictates marriage, home, babies. I may suggest marriage, relationship building, home, relationship, then maybe babies if that is right for you, and again relationship.
I am very thankful that I have continued to use my blog to describe each of these journeys. Each project has been different. Some things we have done together and some things one of us did. I have been able to collect our experience in one place and see that we, together, have gotten a lot done.
To be honest, I can't say if we were ready for home ownership. I thought we were. But there have been many challenges that I don't think we were ready for emotionally. I am very thankful that Tom has the knowledge and skills for renovation. And I am glad I have many sources of inspiration. Together, I wish there was a better way to share these skills with each other. Tom has been overwhelmed, we have been restricted financially, and I have been incredibly impatient at times.
Don't feel compelled to make the decision of home ownership without considering what may be motivating you to do so. Our motivations for owning a home were different from one another. Therefore, our expectations were different. All without realizing it because we both agreed it was what we wanted and didn't discuss it beyond that. (Terrible pattern that is present in many aspects of our relationship I might add.)
I am not sure what I might suggest to remediate these troubles. But I'm sure there are great sources for that.
It has been a lesson in patience for sure. Our gains have been small at times, but it has been an awesome feeling that slowly, bit by bit, project by project, there is less to "get done" and more to enjoy about our home.
It's a wonderful feeling, a great sense of accomplishment, to say, "I did that." I am sure there are other ways to embrace this feeling, but as we contemplated purchasing a home, there was no "better" way to share that together. Our society's culture dictates marriage, home, babies. I may suggest marriage, relationship building, home, relationship, then maybe babies if that is right for you, and again relationship.
I am very thankful that I have continued to use my blog to describe each of these journeys. Each project has been different. Some things we have done together and some things one of us did. I have been able to collect our experience in one place and see that we, together, have gotten a lot done.
Monday, December 5, 2016
Kitchen painted!
Recently, we helped a family member move in and do some painting in the new house. I was pretty jealous by the end of that day. My house has felt so torn apart these 2 years. I didn't want the jealousy to be a negative jealousy because I was truly happy for my family. So I used my feelings to motivate myself positively. After spending a few hours painting at their house, I decided to go home and paint my kitchen!
I spent from 10:00am - 8:00pm yesterday prepping and painting my kitchen. I had a bit of help from Tom with some mud work that needed to be done around our slider door. We had taken down wall paper that was there from the previous owners. We kinda went heavy with the removal and did light damage to the dry wall which was fixed by Tom's mud work. This part sort of slowed me down at first, because I had to wait for it to dry before I could prime that wall space. But I used that time constructively and began priming the window trim. It needed to be repolyed or painted. I wanted to brighten that space a bit, so I decided to paint it. I then sanded the mud, vacuumed the dust, and primed the wall space around the slider. I didn't prime the rest of kitchen.
I know it was a bit risky painting an old kitchen space without priming. But the paint we bought was intended to be used without primer and I've had time working against me. We had always primed first, but I knew with only me painting, I wouldn't be able to do 2 coats of color in addition to priming. So as I made breakfast, I cleaned around the spaces near the oven with a microfiber cloth and hot water.
So I primed the trim around the window, primed the walls space around the slider, painted the window trim, and then began working in small sections around the kitchen. I would cut-in/ trim each section and then roll it out. I really liked that I chose to do this. I cut up the time I was trimming all at once, and since I was rolling while the trim was still wet, the results were very nice. It was hard to work above the cupboards. I was hunched over, twisted, and stretched. By the end of the first coat, it was 6 or 6:30pm. I was TIRED and ready to be done.
I called Tom in and asked for his opinion. I thought it looked pretty good and was tired. I thought, maybe I could leave it this way and do the second coat when Tom does the ceiling. (The ceiling dry wall tape has split in a couple spots and Tom has to redo that before painting. I insisted we paint the kitchen anyway and do touch ups as needed when the ceiling gets done.)
He suggested I keep going in sections and when I am too tired to keep going, I can stop.
I was relieved to hear him say that. Like it was ok and I wouldn't be a failure if I didn't finish in one day.
I got started on the second coat. Just hoping that I could finish but somewhat doubting it. We hadn't figured out dinner yet, and I would need a shower before bed. Next thing I knew, it was 7:15, and I was 2/3 done! I just had the space above the sink and around the slider. I was so happy! I was done painting and cleanup began at 8:00pm. Tom helped with clean up and I showered. He got Chinese take out and we ate.
The paint color I used on the walls was a custom Valspar flat color. We bought too much paint when we did the guest room and office. I gave a gallon to our family for the new house and had a gallon re-tinted to use in my kitchen.
The paint color I used on the trim around the window is Valspar Ancient Stone.
It feels like our updating has been scattered, but at least things are getting done.
I read another DIY blog and she had an ongoing list at the end of each blog. I like that idea. Also, I watched a video tutorial to figure out how to add a slideshow. Hope you like the updates!
Paint trim around the window
Paint walls
I spent from 10:00am - 8:00pm yesterday prepping and painting my kitchen. I had a bit of help from Tom with some mud work that needed to be done around our slider door. We had taken down wall paper that was there from the previous owners. We kinda went heavy with the removal and did light damage to the dry wall which was fixed by Tom's mud work. This part sort of slowed me down at first, because I had to wait for it to dry before I could prime that wall space. But I used that time constructively and began priming the window trim. It needed to be repolyed or painted. I wanted to brighten that space a bit, so I decided to paint it. I then sanded the mud, vacuumed the dust, and primed the wall space around the slider. I didn't prime the rest of kitchen.
I know it was a bit risky painting an old kitchen space without priming. But the paint we bought was intended to be used without primer and I've had time working against me. We had always primed first, but I knew with only me painting, I wouldn't be able to do 2 coats of color in addition to priming. So as I made breakfast, I cleaned around the spaces near the oven with a microfiber cloth and hot water.
So I primed the trim around the window, primed the walls space around the slider, painted the window trim, and then began working in small sections around the kitchen. I would cut-in/ trim each section and then roll it out. I really liked that I chose to do this. I cut up the time I was trimming all at once, and since I was rolling while the trim was still wet, the results were very nice. It was hard to work above the cupboards. I was hunched over, twisted, and stretched. By the end of the first coat, it was 6 or 6:30pm. I was TIRED and ready to be done.
I called Tom in and asked for his opinion. I thought it looked pretty good and was tired. I thought, maybe I could leave it this way and do the second coat when Tom does the ceiling. (The ceiling dry wall tape has split in a couple spots and Tom has to redo that before painting. I insisted we paint the kitchen anyway and do touch ups as needed when the ceiling gets done.)
He suggested I keep going in sections and when I am too tired to keep going, I can stop.
I was relieved to hear him say that. Like it was ok and I wouldn't be a failure if I didn't finish in one day.
I got started on the second coat. Just hoping that I could finish but somewhat doubting it. We hadn't figured out dinner yet, and I would need a shower before bed. Next thing I knew, it was 7:15, and I was 2/3 done! I just had the space above the sink and around the slider. I was so happy! I was done painting and cleanup began at 8:00pm. Tom helped with clean up and I showered. He got Chinese take out and we ate.
The paint color I used on the walls was a custom Valspar flat color. We bought too much paint when we did the guest room and office. I gave a gallon to our family for the new house and had a gallon re-tinted to use in my kitchen.
The paint color I used on the trim around the window is Valspar Ancient Stone.
It feels like our updating has been scattered, but at least things are getting done.
I read another DIY blog and she had an ongoing list at the end of each blog. I like that idea. Also, I watched a video tutorial to figure out how to add a slideshow. Hope you like the updates!
Here is my list for the kitchen:
Paint the rest of the trim
redo drywall tape on ceiling
fix popped drywall screws
paint ceiling
update light fixtures
add cabinet hardware
new flooring (in my dreams!)
Sunday, October 16, 2016
Seat Yourself
I had an old chair that the cushion was no longer a cushion and the black covering was just boring. I decided to redo it with a bit of the fabric that I got at a thrift store for 2 bucks. I have probably 3 yards of this fabric.
I pulled off the fabric and the cushion. I found that the chair actually has a hole cut through the seat of the chair. Kind of like it used to be a chamber pot chair. Gross.
But whatever. Still a cool chair.
The board holding the cushion was in ok condition. It was probably about 1/4 or 3/8 inch thick. Which was sufficient since it rests on the seat of the chair. You could tell that they had re-purposed a scrap piece of wood. It sort of resembled material that cupboards or wood paneling is made of.
I purchased a $8 - 2 inch chair cushion from Fields Fabrics. I cut the foam with a utility knife using the wood seat as my guide. This was a bit trickier that I thought. Since the foam was so thick, I had to make two or more cuts down the side careful not to cut on an angle.
I then laid the fabric over the wood and cushion and cut to size with enough to pull over the edge.
I then stapled the fabric to the wood using 1/4 inch staples. I edged it with upholstery cording on 3 of the sides. I did not put cording around the back side of the seat.
Here's the results!


Sorry that I wasn't great at taking pictures throughout the process. I was too busy trying to figure it out. I have another chair, a different style, that I will be covering with the same material, and I will be more intentional about taking pictures throughout that process.
Best,
Melanie
I pulled off the fabric and the cushion. I found that the chair actually has a hole cut through the seat of the chair. Kind of like it used to be a chamber pot chair. Gross.
But whatever. Still a cool chair.
The board holding the cushion was in ok condition. It was probably about 1/4 or 3/8 inch thick. Which was sufficient since it rests on the seat of the chair. You could tell that they had re-purposed a scrap piece of wood. It sort of resembled material that cupboards or wood paneling is made of.
I purchased a $8 - 2 inch chair cushion from Fields Fabrics. I cut the foam with a utility knife using the wood seat as my guide. This was a bit trickier that I thought. Since the foam was so thick, I had to make two or more cuts down the side careful not to cut on an angle.
I then laid the fabric over the wood and cushion and cut to size with enough to pull over the edge.
I then stapled the fabric to the wood using 1/4 inch staples. I edged it with upholstery cording on 3 of the sides. I did not put cording around the back side of the seat.
Here's the results!


Sorry that I wasn't great at taking pictures throughout the process. I was too busy trying to figure it out. I have another chair, a different style, that I will be covering with the same material, and I will be more intentional about taking pictures throughout that process.
Best,
Melanie
Thursday, July 7, 2016
Damn Jam
 |
| Me versus the boiling raspberry jam. The jam won. |
So our neighbors from across the field asked us to care for their chickens while they were away on vacation. They also pointed out another neighbor on vacation who had requested that the raspberries be picked from their bushes to encourage berries through the season.
Tom and I picked 5 dry cups of berries. (That's really a whole other funny story!)
Yesterday, I made jam.
I was convinced I was a terrible jam maker.
For 1.) I am terrible about reading a recipe. Especially ones that emphasize a process. Such as jam. I normally read for ingredients and go from there.
2.) I am not great at doing things quickly. I have only been able to manage making a meal with a single side and time things to be done all at once maybe ONE time in my life.
Jam is processed rather quickly.
Set up takes the longest- sanitizing jars, gathering utensils, preparing the fruit, and measuring the sugar.
This time I thought I managed it pretty well.
Until the almost end :(
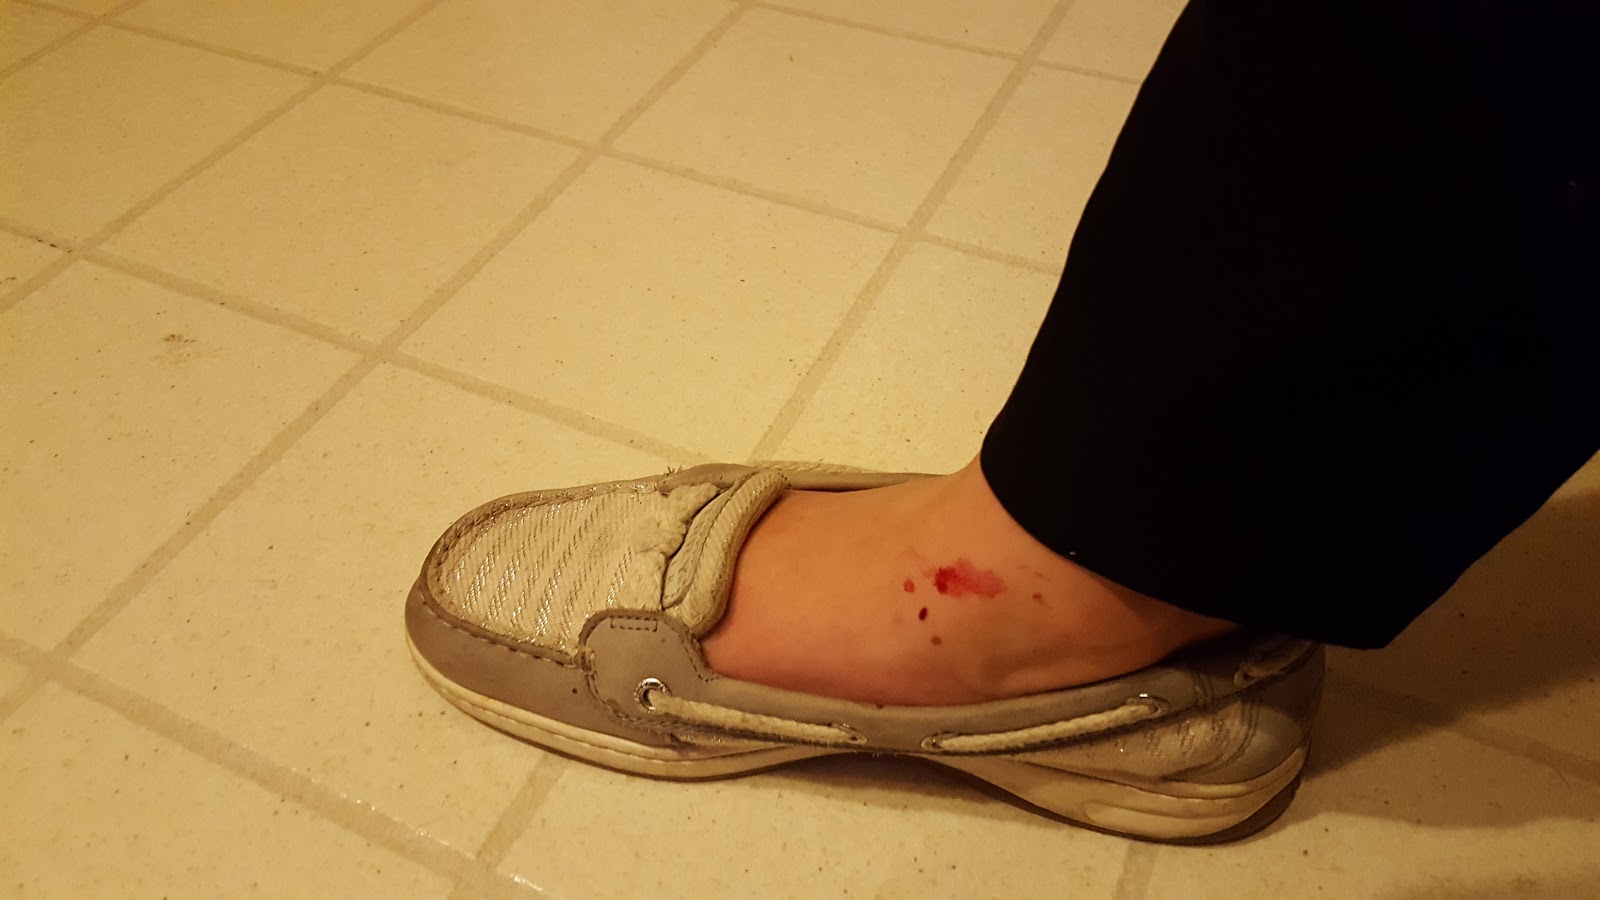
I had one hiccup while boiling the fruit. That being that it was definitely boiling and some decided to jump out and land on my foot. Ouch!
But on a more serious note, I had read in a canning book that jam temps out at 225F to set properly.
So I boiled my jam for the 1 minute after mixing in the sugar, but the temp only got to 205. I boiled again and still only got to 205. I noticed the texture off the spoon seemed nice and thick so I said screw the temp. I was nervous of "burning" the flavor of the jam or possibly making it too thick. I had some help with Tom through this.
Tom held the jars while I poured in the jam. I water bathed them for 10 minutes and took them out.
That's when I noticed my BIG problem.
Air.
I forgot to take the air out of the jars before putting the lids on. They didn't explode, which is good, but I was sure that this could potentially compromise the shelf life.
So I immediately popped the lids, took out the air, and put the lids back on. But I was so worried about the air, I forgot to wipe the edges clean. I popped the lids again, wiped the edges, put the lids back on, and water bathed for a second 10 minutes.
At this point. I was worried about the lids sealing because I had already processed them once. I thought maybe I had a chance, since the gum never really cooled and formed to the jar.
While watching Orange is the New Black, Tom looked over at me after hearing a distinct PING. My only response was, "Damn, that's a good sounds to hear!"
Twice more and I was feeling good.
So only 2 things left to worry about.
1.) Taste.
2.) Texture.
I boiled twice and water bathed twice. I hope it doesn't alter the taste and/or texture to be unfavorable. Taste testing is tonight. I'll report back what we think.

Tuesday, June 14, 2016
Veggies & Herbs
Tom really wanted to do a large garden this year. I am hesitant. I know how much time I have already spent in my flower beds improving and maintaining them. It's been a lot of work. I can't imagine adding in a large vegetable garden. In addition, we are very undecided as to where in our yard we would put such a garden.
Our neighbor offered a solution.
She gave us an old 55 gallon barrel.
We cut it in half. Drilled holes in the bottom for drainage. Built a base with 2 by fours. Lined them with cocoa liner (the garden center was sold out of the cheaper black landscaping material). Then layered cow manure, miracle grow garden soil, and top soil.
Here are the results:
I also planted my herbs.
I am excited to see how this turns out! Maybe next year, we will put in a larger garden. Or maybe we will find that this offers enough of the experience to harvest a few veggies ourselves.
Note: the edges are a little sharp on the barrels. Tom has an idea to cut a slit in a hose and slip that over the edges. We haven't done this yet. But, I am anticipating that we will need to especially on the barrel with the squashes. I don't want to get cut and I don't want the edges to damage the plants as they grow and vine out.
Our neighbor offered a solution.
She gave us an old 55 gallon barrel.
We cut it in half. Drilled holes in the bottom for drainage. Built a base with 2 by fours. Lined them with cocoa liner (the garden center was sold out of the cheaper black landscaping material). Then layered cow manure, miracle grow garden soil, and top soil.
Here are the results:
 |
| top row: bell peppers bottom row: broccoli and cauliflower |
 |
| top row: brussel sprouts bottom row: zucchini and summer squash |
 |
| round planter is patio cucumbers left square planter is jalapeno peppers right square planter is roma tomato |
 |
| oregano, sweet basil, dill, cilantro, thyme |
Note: the edges are a little sharp on the barrels. Tom has an idea to cut a slit in a hose and slip that over the edges. We haven't done this yet. But, I am anticipating that we will need to especially on the barrel with the squashes. I don't want to get cut and I don't want the edges to damage the plants as they grow and vine out.
Sunday, October 18, 2015
Decor Galore
In addition to not being sure if I hate the living room paint color or not, I was getting that a college dorm house vibe again. I needed something to change. My mom was here this weekend and we went to a surplus store. I bought some art work that I thought might help the space out a bit.
My approach to putting up the art work was inspired by a pinterest post. You've probably seen it or one like it. My mom found it kind of confusing. It was a lot of work.
I started by gathering all the pieces to be put up. Cut a template for each piece using newspaper. Arranged them on the floor for a general out lay.
Taped them to the walls to determine spacing using a pencil and level to help.
Tapped the nails.
And hung them up.
To be very transparent- this seemed helpful in theory, but it slowed the process way down. What I thought would take an hour or so took almost all afternoon and into the evening. And I think it could have been possible to enjoy the results just as much, if not more, by starting with one or two pieces put up and placing others around them by eye-balling it.
Any ways... Here's my results.
My approach to putting up the art work was inspired by a pinterest post. You've probably seen it or one like it. My mom found it kind of confusing. It was a lot of work.
I started by gathering all the pieces to be put up. Cut a template for each piece using newspaper. Arranged them on the floor for a general out lay.
Taped them to the walls to determine spacing using a pencil and level to help.
Tapped the nails.
And hung them up.
To be very transparent- this seemed helpful in theory, but it slowed the process way down. What I thought would take an hour or so took almost all afternoon and into the evening. And I think it could have been possible to enjoy the results just as much, if not more, by starting with one or two pieces put up and placing others around them by eye-balling it.
Any ways... Here's my results.
Monday, September 14, 2015
Bathroom Reno... Sorta.
Tom left for the weekend. So I bought some paint and a pre-cut sheet of vinyl flooring. Well, let's just say he was excited to help, because he came back home and we accomplished more than I had planned.
I used a darker grey for the bathroom. I used the same color we used in the living room on the insides of the cabinets to add a pop of color.
I took the doors off on the bottom cabinets to the left for a more "open" concept and have hidden things/organized with these great bins I got from a home store.
We added a curved double shower rod, new handles/knobs to the cabinets. We replaced the toilet American Standard Clean Dual Flush toilet! I am a dork, and I am super excited for this toilet. I love that we will be saving some water!
I know the flooring doesn't match exactly, but we got close enough. The pre-cut sheet was super affordable. We didn't adhear it to the existing floor.
I don't have a before picture! I found a couple before pictures!


After pictures:


We WILL eventually be putting in the new tub, fan, and sink faucet (already purchased- they are in the basement still in the boxes!). We have to purchase the tub and shower fixtures that match the faucet. Then, we have to pick out and purchase new tile flooring, the tile surrounding to the shower, and backslash tile for the vanity.
My dream would be for a new vanity & vanity top and a pocket door. This space is SMALL.
I used a darker grey for the bathroom. I used the same color we used in the living room on the insides of the cabinets to add a pop of color.
I took the doors off on the bottom cabinets to the left for a more "open" concept and have hidden things/organized with these great bins I got from a home store.
We added a curved double shower rod, new handles/knobs to the cabinets. We replaced the toilet American Standard Clean Dual Flush toilet! I am a dork, and I am super excited for this toilet. I love that we will be saving some water!
I know the flooring doesn't match exactly, but we got close enough. The pre-cut sheet was super affordable. We didn't adhear it to the existing floor.


After pictures:


We WILL eventually be putting in the new tub, fan, and sink faucet (already purchased- they are in the basement still in the boxes!). We have to purchase the tub and shower fixtures that match the faucet. Then, we have to pick out and purchase new tile flooring, the tile surrounding to the shower, and backslash tile for the vanity.
My dream would be for a new vanity & vanity top and a pocket door. This space is SMALL.
Thursday, April 30, 2015
Closet!
Tom finished my custom closet today! EEek :) This is in our master bedroom. We are not planning to do this to the other closets. Not sure what we will do with those yet. I love that the top shelf is not the full width of the closet. The bottom shelf is the full width of the closet. I had envisioned that the bottom shelf would be lower, so that we could fit bins on top as well as below the shelf , but it might still work out- my dresses just graze the top of the bin as you can see in the last picture.
We used bright white paint on the inside of the closet. I know... I know. I keep using bright white but again, the lighting is what I am thinking about. There are no lights in the closets. Also, we are choosing to leave the doors off of all the closets. There were flimsy and in terrible shape. The sliding tracks were bent, and one half of one closet door was missing completely anyhow.
What do you think?


We used bright white paint on the inside of the closet. I know... I know. I keep using bright white but again, the lighting is what I am thinking about. There are no lights in the closets. Also, we are choosing to leave the doors off of all the closets. There were flimsy and in terrible shape. The sliding tracks were bent, and one half of one closet door was missing completely anyhow.
What do you think?


Sunday, December 21, 2014
Curtains!
I had bought a bunch of curtains from Meijer that were on clearance very close to us moving all into the house. I ordered some curtain rods from Khol's. They are less than impressive to say the least. I would NOT recommend them. I didn't return them only because I got them so cheap, with free shipping, and do not want to spend any more time to find good ones right now.
So any way, I've had them for a bit now and have bugged Tom about getting them put up nearly every day. Pretty sure he wants to kill me.
He got them up! Who knew that it could be so challenging though!?
Like... how far to the left and right of the window trim?
How far above the window trim vs how far down from the ceiling?
Or - put them right in the trim?
Let's just say there a few too many holes in my walls following this "experiment" and I know for sure Tom has plotted my torture. They still aren't how I would like them- they aren't all uniform (some rooms are higher than others) and I'm still not sure about the measurements. But we finally just put them up and will stay that way until we both have enough energy to try this again. We have privacy and efficiency!
So, I'm begging - If you have some insight, PLEASE COMMENT!
So any way, I've had them for a bit now and have bugged Tom about getting them put up nearly every day. Pretty sure he wants to kill me.
He got them up! Who knew that it could be so challenging though!?
Like... how far to the left and right of the window trim?
How far above the window trim vs how far down from the ceiling?
Or - put them right in the trim?
Let's just say there a few too many holes in my walls following this "experiment" and I know for sure Tom has plotted my torture. They still aren't how I would like them- they aren't all uniform (some rooms are higher than others) and I'm still not sure about the measurements. But we finally just put them up and will stay that way until we both have enough energy to try this again. We have privacy and efficiency!
So, I'm begging - If you have some insight, PLEASE COMMENT!
 |
| A picture from the first attempt at putting the rods up. We changed it. |
Sunday, November 30, 2014
Dusted
Today I started to finish a project- I wanted to scrap/sandoff the remaining glue left behind when we stripped the wallpaper in the hallway. Even while taking the wallpaper down originally, we were scrapping a lot of glue, but there is too much left behind to ignore. Not only am I concerned that if I left it, the glue would seep through the primer and paint, but the texture it left on the walls was terrible! I am convinced that they had applied the glue to the wall and then also used preglued wallpaper. There's so much glue!
Tom was hunting for the weekend and I began this project in the morning. I still hadn't finished until late after he got home. He helped me finish. My right arm and elbow had gone numb! I still just can't believe how much glue was used to put up that wall paper. The only way to get this stuff off was to sand it.


 I taped up some plastic to try and contain the dust. There was just too much! Can you believe this?!? After I finished sanding, I used the shop vac to get up as much dust as possible. Then, I did take some hot water and sponged the walls down again. I just don't want this stuff to seep through the primer and paint.
Finally, it's done though. I am excited to get the paint up! We are just going to use the bright standard white. There's zero natural light in this hallway. Bummer!
Saturday, November 1, 2014
Paint it... Well... not Black...
At this point, the floors are refinished, the walls and ceilings are primed. I picked out some colors. Literally just went into Lowes and picked from the color cards. I just crossed my fingers that they would work out. We used Valspar Reserve with a flat finish for the living room and the three rooms. The ceilings we used the standrad bright white because to me, there is not enough natural light in the space to use an eggshell color.
 We did the same color in the two small rooms. We used Cinncinnatian Hotel Hannaford. Isn't that quite a name for a paint color? I guess you can only have so many variations of beige before you need to get super creative!


We started painting the color in our room and the small rooms first so that we can finally move our bedroom from the living room and our boxes from the garage.
We did the painting in this room just after we finished the hardwood floors, so it was done much earlier in October, but I just never got around to posting about our colors.
 |
We did Urban Sunrise, and I LOVE this gray.
|
 |
| It is perfect! |
 We did the same color in the two small rooms. We used Cinncinnatian Hotel Hannaford. Isn't that quite a name for a paint color? I guess you can only have so many variations of beige before you need to get super creative!


 |
| We kind of hate this color. I feel like I am sitting in a fish bowl! |
Wednesday, October 1, 2014
Almost Dreamy- Hardwood Floors!
We were very excited to find out that under the carpeting in the three bedrooms in the home was hardwood floor. We did not discover that until we took possession of the home and tore out the carperting! What a beautiful surprise. Almost.
Who puts carpeting over hardwood floors???
Crazy people. That's who. Here's why:
 small room 1. This is truly the worst of the rooms. The spots where the carpet padding adhered to the floor were much larger than in the other two rooms. And it covered most of the floor space.
 small room 1 again. This is amidst all my attempts to get it clean. I think I had spent about 8 hours trying different methods.
  I couldn't find a better picture of this room at the moment, but this was the second worst of the three rooms. The spots were not as big. about dime to a quarter sized spots that covered a majority of the floor.
It was the best of the three rooms. The spots were dime sized or small and only on parts of the floor that must have been the walkway around their bed.

 We used Minwax Wood Finish Golden Oak 210B stain. It did leave us with a slightly more "orange" appearance than we would have preferred, but it makes well with the existing trim (which we may change later). Oh well. Lesson learned. Although, I am happy with how dark it make the grain.
 We used Minwax fast drying oil based polyurethane in Clear Satin Finish. We used a foam roller that came suggested by the guy who helped me at the hardware store. Tom was rather unhappy with the results after three coats. It applied the oil poly too thick and teeny tiny bubbles can be felt with your hand and seen if you are close to the floor. I think they look great, and have to be refinished to maintain them anyway so I see no problem. Another lesson learned. Tom has finished wood floors in the past with moleskin cloth and we will be doing that in the future when we have to refinish them. I also wonder if a water based poly would have lessened the "orange" appearance. Can you do a water poly over an oil poly?
Sunday, September 28, 2014
We're All In
We have left the rental completely and moved everything to the house. Tom's mom and sister came to help and we were able to borrow a straight truck with a lift from Tom's work. We got everything over to the house relatively quickly! It helps the move was about 5 miles round trip for each load. We have a lot of boxes in the garage and our temporary bedroom will be the living room since we decided to redo the floors in those rooms before moving everything in and having to move everything back out. We're excited for that to get done!

 There's a street light just in front of our house :( Tom and I both prefer a very dark room at night, so this means I am going shopping for curtains!

 There's a street light just in front of our house :( Tom and I both prefer a very dark room at night, so this means I am going shopping for curtains!
 Monday, September 22, 2014
It's all about the primer...
Next to the light demo we did removing all carpeting and the stuff from the basement, one of the first things we have done since we took possession of the house is prime the walls and ceilings in the bedrooms and living room with Kilz. Tom and I had both used this stuff previously with construction projects and have always been happy with the results.
We did two coats of primer. All of the walls and ceilings in our bedrooms and living room are plaster. They soaked up the primer so much we decided to do a second coat! And Tom just likes doing two coats of primer to cover smells and any stains that might exist. We got so used to putting a nice thick layer though, that this did cause a bit of a problem in the one small room that had been painted dark blue (I think they might have used an oil based paint. Not sure is this had an influence on the running or not). In the corners of the walls in that room, there were pretty significant runs. Nothing a bit of sanding after letting it dry wouldn't fix.
We even primed the floor of the living room with 2 coats of Kilz. When we move into the house, we are going to be staying in the living room since the floors aren't done in the rooms yet. And it will be some time before we have enough money saved up to put down new flooring.
We primed the walls even before we redo the floors. Primarily just because of how timing is going to work out for us to rent the sander and do all that work on the floors start to finish and moving into the house. My preference would have been to paint first so that we didn't have to worry so much about drop cloths and worry about any dust on the walls but oh well!
We began cutting in on the 20th and had everything done (walls, ceilings, and closets) in the three rooms and the living room in the late hours of the 21st. We primed and primed away! We had some Help from Tiff during priming also!
Guest Room Before (sort of... we had already began cutting in when I took the pictures):


We began cutting in on the 20th and had everything done (walls, ceilings, and closets) in the three rooms and the living room in the late hours of the 21st. We primed and primed away! We had some Help from Tiff during priming also!
Guest Room Before (sort of... we had already began cutting in when I took the pictures):


Guest room during:
|
| This picture, if you can tell, shows how we had some running in the corners with the primer on top of the blue painted walls. |

Office before:


Office During:
 |
| Mauve is almost gone! |
I didn't include the after pictures or pictures from the master bedroom. I honestly think I forgot to take before pictures of the master. It was the room in the best condition so I don't think I was worried about it at all. The after pictures are hard to tell which room is which after a certain point. I mean, they just all end up being a nice blank white. Use your imaginations.
Tuesday, September 16, 2014
Demo Started
So this is what we have done the first 24 hours in the house! I had a friend over and we cleaned the cupboards of the kitchen and cleaned up the bathrooms. Here's some of other pictures of what we have gotten done so far.
 The pile of stuff torn out of the basement (in fact this is after we had already piled some in Tom's truck and in the small dumpster we had.)
 Basement Demo in progress
 There wasn't paneling here. But this is the corner of the basement to the right of the stairs.
  A nice little handy room that we will store our reno supplies! This room was partially paneled.
  This is the main area of the basement. It was completely paneled and had a drop ceiling; complete with glued olive green shag carpet. I was too slow to get a complete before picture. Tom works FAST!
Subscribe to:
Posts (Atom)