Our house has been the source of frustration and depression over the last two years. It has also been a great source of creativity and reward.
To be honest, I can't say if we were ready for home ownership. I thought we were. But there have been many challenges that I don't think we were ready for emotionally. I am very thankful that Tom has the knowledge and skills for renovation. And I am glad I have many sources of inspiration. Together, I wish there was a better way to share these skills with each other. Tom has been overwhelmed, we have been restricted financially, and I have been incredibly impatient at times.
Don't feel compelled to make the decision of home ownership without considering what may be motivating you to do so. Our motivations for owning a home were different from one another. Therefore, our expectations were different. All without realizing it because we both agreed it was what we wanted and didn't discuss it beyond that. (Terrible pattern that is present in many aspects of our relationship I might add.)
I am not sure what I might suggest to remediate these troubles. But I'm sure there are great sources for that.
It has been a lesson in patience for sure. Our gains have been small at times, but it has been an awesome feeling that slowly, bit by bit, project by project, there is less to "get done" and more to enjoy about our home.
It's a wonderful feeling, a great sense of accomplishment, to say, "I did that." I am sure there are other ways to embrace this feeling, but as we contemplated purchasing a home, there was no "better" way to share that together. Our society's culture dictates marriage, home, babies. I may suggest marriage, relationship building, home, relationship, then maybe babies if that is right for you, and again relationship.
I am very thankful that I have continued to use my blog to describe each of these journeys. Each project has been different. Some things we have done together and some things one of us did. I have been able to collect our experience in one place and see that we, together, have gotten a lot done.
Monday, December 12, 2016
Monday, December 5, 2016
Kitchen painted!
Recently, we helped a family member move in and do some painting in the new house. I was pretty jealous by the end of that day. My house has felt so torn apart these 2 years. I didn't want the jealousy to be a negative jealousy because I was truly happy for my family. So I used my feelings to motivate myself positively. After spending a few hours painting at their house, I decided to go home and paint my kitchen!
I spent from 10:00am - 8:00pm yesterday prepping and painting my kitchen. I had a bit of help from Tom with some mud work that needed to be done around our slider door. We had taken down wall paper that was there from the previous owners. We kinda went heavy with the removal and did light damage to the dry wall which was fixed by Tom's mud work. This part sort of slowed me down at first, because I had to wait for it to dry before I could prime that wall space. But I used that time constructively and began priming the window trim. It needed to be repolyed or painted. I wanted to brighten that space a bit, so I decided to paint it. I then sanded the mud, vacuumed the dust, and primed the wall space around the slider. I didn't prime the rest of kitchen.
I know it was a bit risky painting an old kitchen space without priming. But the paint we bought was intended to be used without primer and I've had time working against me. We had always primed first, but I knew with only me painting, I wouldn't be able to do 2 coats of color in addition to priming. So as I made breakfast, I cleaned around the spaces near the oven with a microfiber cloth and hot water.
So I primed the trim around the window, primed the walls space around the slider, painted the window trim, and then began working in small sections around the kitchen. I would cut-in/ trim each section and then roll it out. I really liked that I chose to do this. I cut up the time I was trimming all at once, and since I was rolling while the trim was still wet, the results were very nice. It was hard to work above the cupboards. I was hunched over, twisted, and stretched. By the end of the first coat, it was 6 or 6:30pm. I was TIRED and ready to be done.
I called Tom in and asked for his opinion. I thought it looked pretty good and was tired. I thought, maybe I could leave it this way and do the second coat when Tom does the ceiling. (The ceiling dry wall tape has split in a couple spots and Tom has to redo that before painting. I insisted we paint the kitchen anyway and do touch ups as needed when the ceiling gets done.)
He suggested I keep going in sections and when I am too tired to keep going, I can stop.
I was relieved to hear him say that. Like it was ok and I wouldn't be a failure if I didn't finish in one day.
I got started on the second coat. Just hoping that I could finish but somewhat doubting it. We hadn't figured out dinner yet, and I would need a shower before bed. Next thing I knew, it was 7:15, and I was 2/3 done! I just had the space above the sink and around the slider. I was so happy! I was done painting and cleanup began at 8:00pm. Tom helped with clean up and I showered. He got Chinese take out and we ate.
The paint color I used on the walls was a custom Valspar flat color. We bought too much paint when we did the guest room and office. I gave a gallon to our family for the new house and had a gallon re-tinted to use in my kitchen.
The paint color I used on the trim around the window is Valspar Ancient Stone.
It feels like our updating has been scattered, but at least things are getting done.
I read another DIY blog and she had an ongoing list at the end of each blog. I like that idea. Also, I watched a video tutorial to figure out how to add a slideshow. Hope you like the updates!
Paint trim around the window
Paint walls
I spent from 10:00am - 8:00pm yesterday prepping and painting my kitchen. I had a bit of help from Tom with some mud work that needed to be done around our slider door. We had taken down wall paper that was there from the previous owners. We kinda went heavy with the removal and did light damage to the dry wall which was fixed by Tom's mud work. This part sort of slowed me down at first, because I had to wait for it to dry before I could prime that wall space. But I used that time constructively and began priming the window trim. It needed to be repolyed or painted. I wanted to brighten that space a bit, so I decided to paint it. I then sanded the mud, vacuumed the dust, and primed the wall space around the slider. I didn't prime the rest of kitchen.
I know it was a bit risky painting an old kitchen space without priming. But the paint we bought was intended to be used without primer and I've had time working against me. We had always primed first, but I knew with only me painting, I wouldn't be able to do 2 coats of color in addition to priming. So as I made breakfast, I cleaned around the spaces near the oven with a microfiber cloth and hot water.
So I primed the trim around the window, primed the walls space around the slider, painted the window trim, and then began working in small sections around the kitchen. I would cut-in/ trim each section and then roll it out. I really liked that I chose to do this. I cut up the time I was trimming all at once, and since I was rolling while the trim was still wet, the results were very nice. It was hard to work above the cupboards. I was hunched over, twisted, and stretched. By the end of the first coat, it was 6 or 6:30pm. I was TIRED and ready to be done.
I called Tom in and asked for his opinion. I thought it looked pretty good and was tired. I thought, maybe I could leave it this way and do the second coat when Tom does the ceiling. (The ceiling dry wall tape has split in a couple spots and Tom has to redo that before painting. I insisted we paint the kitchen anyway and do touch ups as needed when the ceiling gets done.)
He suggested I keep going in sections and when I am too tired to keep going, I can stop.
I was relieved to hear him say that. Like it was ok and I wouldn't be a failure if I didn't finish in one day.
I got started on the second coat. Just hoping that I could finish but somewhat doubting it. We hadn't figured out dinner yet, and I would need a shower before bed. Next thing I knew, it was 7:15, and I was 2/3 done! I just had the space above the sink and around the slider. I was so happy! I was done painting and cleanup began at 8:00pm. Tom helped with clean up and I showered. He got Chinese take out and we ate.
The paint color I used on the walls was a custom Valspar flat color. We bought too much paint when we did the guest room and office. I gave a gallon to our family for the new house and had a gallon re-tinted to use in my kitchen.
The paint color I used on the trim around the window is Valspar Ancient Stone.
It feels like our updating has been scattered, but at least things are getting done.
I read another DIY blog and she had an ongoing list at the end of each blog. I like that idea. Also, I watched a video tutorial to figure out how to add a slideshow. Hope you like the updates!
Here is my list for the kitchen:
Paint the rest of the trim
redo drywall tape on ceiling
fix popped drywall screws
paint ceiling
update light fixtures
add cabinet hardware
new flooring (in my dreams!)
Sunday, October 16, 2016
Seat Yourself
I had an old chair that the cushion was no longer a cushion and the black covering was just boring. I decided to redo it with a bit of the fabric that I got at a thrift store for 2 bucks. I have probably 3 yards of this fabric.
I pulled off the fabric and the cushion. I found that the chair actually has a hole cut through the seat of the chair. Kind of like it used to be a chamber pot chair. Gross.
But whatever. Still a cool chair.
The board holding the cushion was in ok condition. It was probably about 1/4 or 3/8 inch thick. Which was sufficient since it rests on the seat of the chair. You could tell that they had re-purposed a scrap piece of wood. It sort of resembled material that cupboards or wood paneling is made of.
I purchased a $8 - 2 inch chair cushion from Fields Fabrics. I cut the foam with a utility knife using the wood seat as my guide. This was a bit trickier that I thought. Since the foam was so thick, I had to make two or more cuts down the side careful not to cut on an angle.
I then laid the fabric over the wood and cushion and cut to size with enough to pull over the edge.
I then stapled the fabric to the wood using 1/4 inch staples. I edged it with upholstery cording on 3 of the sides. I did not put cording around the back side of the seat.
Here's the results!


Sorry that I wasn't great at taking pictures throughout the process. I was too busy trying to figure it out. I have another chair, a different style, that I will be covering with the same material, and I will be more intentional about taking pictures throughout that process.
Best,
Melanie
Sunday, October 2, 2016
Dull Lull
I have done a great amount of gardening this year. Hopefully, I will see the full benefits of next year. I am continuing this fall to thin out some things and continue conceptualizing what I would like to see in the remaining spaces.I need to continue thinning my lillies and lilly of the valley.
I have did a touch of research and have become very familiar with Michigan Native species of the last two summers. I am focusing on those and using them in my garden as much as possible. (I really like the white lillies. I may keep those even as I get closer to mostly native species.)
I have a section of purple cone flower, black eyed susan, milkweek, yarrow that transitions to peony, black eyed susan, New England aster, blue eyed grass, and butterfly weed, transitioning to butterfly weed, new England aster, lupine, prairie smoke, and columbine. I have wild petunia spreading and wild violet as well as ground covers.
I would like to add a couple of planters of ostrich fern out front with my jacob's ladders, trilliums, big leaf aster, and dead nettle. I will keep the dead nettle. I just love how well it blosoms through out the year in my garden. So pretty!
Other than that, we have not done any house projects other than the deck :(
I pulled the nails out of the trim boards if you think that is something. I will be sanding them, priming, and painting white. I think that and painting my kitchen might be two projects I take on this fall.
Thursday, July 7, 2016
Damn Jam
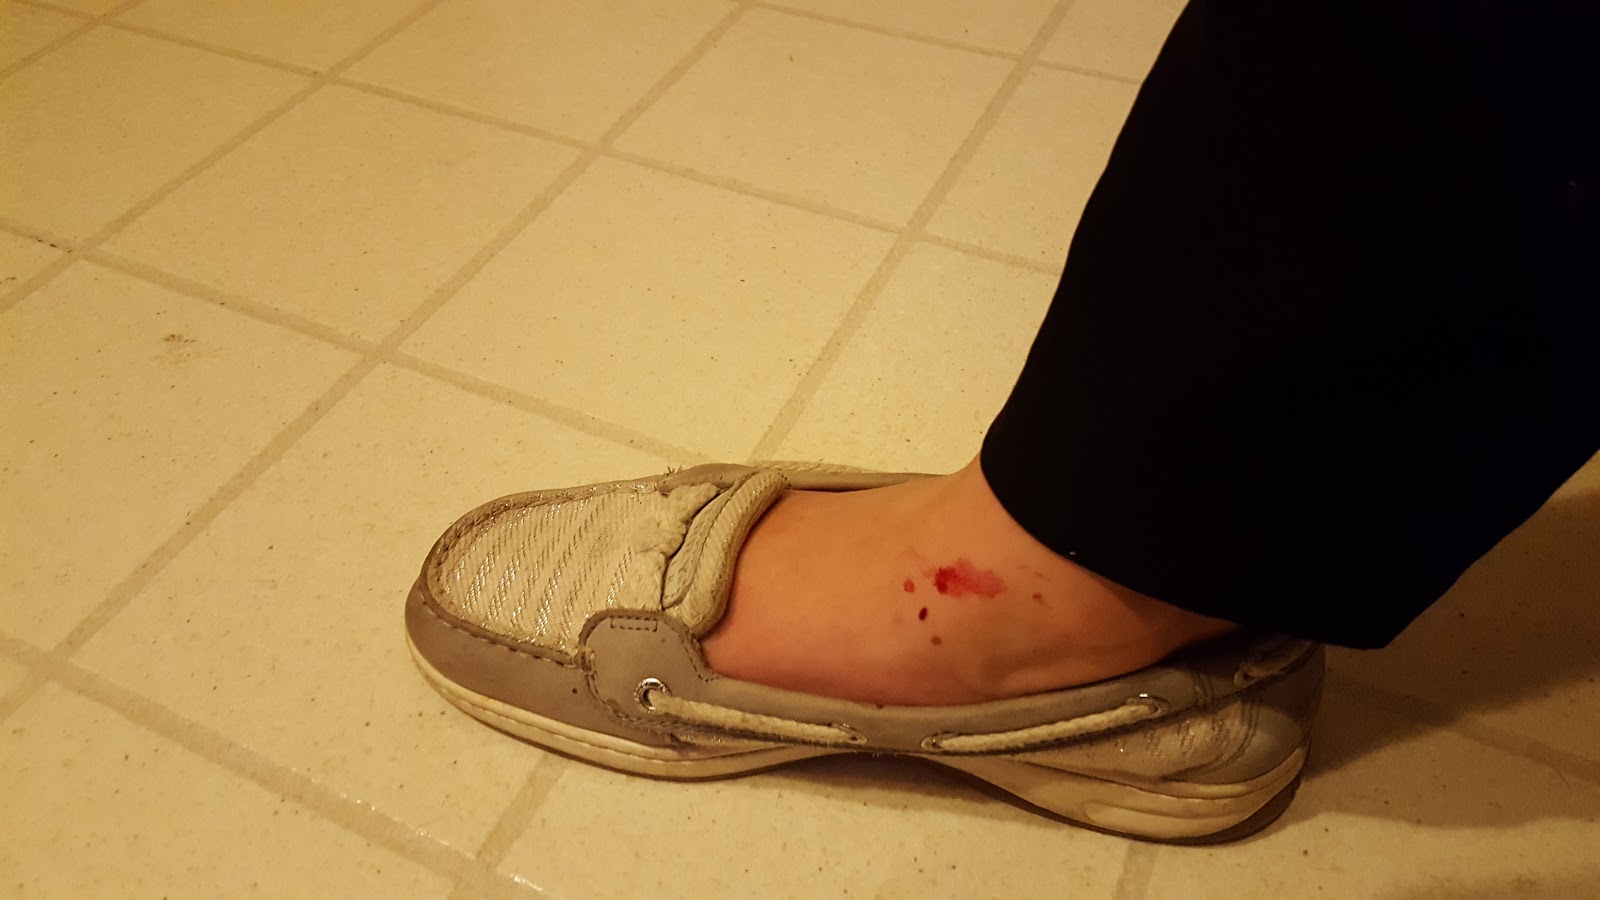 |
| Me versus the boiling raspberry jam. The jam won. |
So our neighbors from across the field asked us to care for their chickens while they were away on vacation. They also pointed out another neighbor on vacation who had requested that the raspberries be picked from their bushes to encourage berries through the season.
Tom and I picked 5 dry cups of berries. (That's really a whole other funny story!)
Yesterday, I made jam.
I was convinced I was a terrible jam maker.
For 1.) I am terrible about reading a recipe. Especially ones that emphasize a process. Such as jam. I normally read for ingredients and go from there.
2.) I am not great at doing things quickly. I have only been able to manage making a meal with a single side and time things to be done all at once maybe ONE time in my life.
Jam is processed rather quickly.
Set up takes the longest- sanitizing jars, gathering utensils, preparing the fruit, and measuring the sugar.
This time I thought I managed it pretty well.
Until the almost end :(
I had one hiccup while boiling the fruit. That being that it was definitely boiling and some decided to jump out and land on my foot. Ouch!
But on a more serious note, I had read in a canning book that jam temps out at 225F to set properly.
So I boiled my jam for the 1 minute after mixing in the sugar, but the temp only got to 205. I boiled again and still only got to 205. I noticed the texture off the spoon seemed nice and thick so I said screw the temp. I was nervous of "burning" the flavor of the jam or possibly making it too thick. I had some help with Tom through this.
Tom held the jars while I poured in the jam. I water bathed them for 10 minutes and took them out.
That's when I noticed my BIG problem.
Air.
I forgot to take the air out of the jars before putting the lids on. They didn't explode, which is good, but I was sure that this could potentially compromise the shelf life.
So I immediately popped the lids, took out the air, and put the lids back on. But I was so worried about the air, I forgot to wipe the edges clean. I popped the lids again, wiped the edges, put the lids back on, and water bathed for a second 10 minutes.
At this point. I was worried about the lids sealing because I had already processed them once. I thought maybe I had a chance, since the gum never really cooled and formed to the jar.
While watching Orange is the New Black, Tom looked over at me after hearing a distinct PING. My only response was, "Damn, that's a good sounds to hear!"
Twice more and I was feeling good.
So only 2 things left to worry about.
1.) Taste.
2.) Texture.
I boiled twice and water bathed twice. I hope it doesn't alter the taste and/or texture to be unfavorable. Taste testing is tonight. I'll report back what we think.

Tuesday, June 14, 2016
Veggies & Herbs
Tom really wanted to do a large garden this year. I am hesitant. I know how much time I have already spent in my flower beds improving and maintaining them. It's been a lot of work. I can't imagine adding in a large vegetable garden. In addition, we are very undecided as to where in our yard we would put such a garden.
Our neighbor offered a solution.
She gave us an old 55 gallon barrel.
We cut it in half. Drilled holes in the bottom for drainage. Built a base with 2 by fours. Lined them with cocoa liner (the garden center was sold out of the cheaper black landscaping material). Then layered cow manure, miracle grow garden soil, and top soil.
Here are the results:
I also planted my herbs.
I am excited to see how this turns out! Maybe next year, we will put in a larger garden. Or maybe we will find that this offers enough of the experience to harvest a few veggies ourselves.
Note: the edges are a little sharp on the barrels. Tom has an idea to cut a slit in a hose and slip that over the edges. We haven't done this yet. But, I am anticipating that we will need to especially on the barrel with the squashes. I don't want to get cut and I don't want the edges to damage the plants as they grow and vine out.
Our neighbor offered a solution.
She gave us an old 55 gallon barrel.
We cut it in half. Drilled holes in the bottom for drainage. Built a base with 2 by fours. Lined them with cocoa liner (the garden center was sold out of the cheaper black landscaping material). Then layered cow manure, miracle grow garden soil, and top soil.
Here are the results:
 |
| top row: bell peppers bottom row: broccoli and cauliflower |
 |
| top row: brussel sprouts bottom row: zucchini and summer squash |
 |
| round planter is patio cucumbers left square planter is jalapeno peppers right square planter is roma tomato |
 |
| oregano, sweet basil, dill, cilantro, thyme |
Note: the edges are a little sharp on the barrels. Tom has an idea to cut a slit in a hose and slip that over the edges. We haven't done this yet. But, I am anticipating that we will need to especially on the barrel with the squashes. I don't want to get cut and I don't want the edges to damage the plants as they grow and vine out.
Thursday, May 26, 2016
Deck the... deck!
We bought a Generac 2500 PSI washer last week. On Friday, Tom began power washing. We really didn't get much done that evening since we work late. But he hooked it up and played around with it. He found it was a little more powerful than he thought...
Tom didn't realize how powerful his pressure washer would be. He hooked up the straight attachment and "carved" his name into the deck. You could still see it etched in after he washed over the area!
Tom resumed pressure washing on Saturday and finished on Sunday. Probably a bit over 8 cumulative hours of washing. Our water bill is going to be so high!
On Monday, we began using Thompson's WaterSeal Clear Multi-Surface Waterproofer to seal the deck. Tom left work early(ish- he got called back for a service call). I started helping when I got home. We worked together from about 6:45-9:30pm sealing the spindles and other small/tedious areas. Tom knew this would be most time consuming, so we started with that. We left the deck for Tuesday.
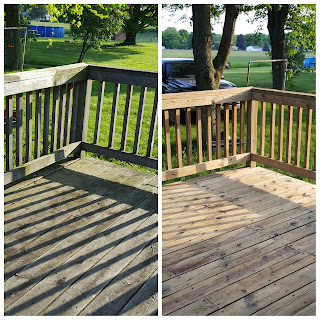
We finished the project at 7:45pm Tuesday! Here are the before and afters:


All the while... the weather forecast kept calling for rain. It kept changing from 30% chance to 60% chance. I was praying so hard that it would not rain!
I didn't sleep well Tuesday night thinking I kept hearing rain. Throughout the day Wednesday, I probably checked the forecast, 10 times. Tom stated he did this as well! Finally, 7:45 rolled about and NO RAIN!!! It began raining about 11:00pm. The water was beading up, just as it should! We are very relieved and happy with the results.
We learned that Thompson's Waterproofer needs to be applied every year. We're ok with that being it was the first time that we did the deck and this year we had to purchase the pressure washer. Next year, we'll be able to afford a longer lasting product and might even pick a tint to add to the stain.
With the remaining sealant, I am going to wash and seal the concrete in the garage!
Tom didn't realize how powerful his pressure washer would be. He hooked up the straight attachment and "carved" his name into the deck. You could still see it etched in after he washed over the area!
 |
| Almost permanent. |
On Monday, we began using Thompson's WaterSeal Clear Multi-Surface Waterproofer to seal the deck. Tom left work early(ish- he got called back for a service call). I started helping when I got home. We worked together from about 6:45-9:30pm sealing the spindles and other small/tedious areas. Tom knew this would be most time consuming, so we started with that. We left the deck for Tuesday.
We finished the project at 7:45pm Tuesday! Here are the before and afters:


All the while... the weather forecast kept calling for rain. It kept changing from 30% chance to 60% chance. I was praying so hard that it would not rain!
I didn't sleep well Tuesday night thinking I kept hearing rain. Throughout the day Wednesday, I probably checked the forecast, 10 times. Tom stated he did this as well! Finally, 7:45 rolled about and NO RAIN!!! It began raining about 11:00pm. The water was beading up, just as it should! We are very relieved and happy with the results.
 |
| railing |
 |
| deck |
With the remaining sealant, I am going to wash and seal the concrete in the garage!
Subscribe to:
Posts (Atom)